Understanding Tevo Tarantula Limit Switches
The Tevo Tarantula 3D printer, a popular choice for hobbyists and enthusiasts, relies on various components to function correctly. Among these, limit switches play a critical role in ensuring precise movements and preventing mechanical damage. This comprehensive guide dives deep into the world of Tevo Tarantula limit switches, covering everything from their basic function to troubleshooting common problems and implementing upgrades. Whether you’re a seasoned 3D printing veteran or just starting, this guide will equip you with the knowledge to maintain, troubleshoot, and optimize your Tevo Tarantula’s limit switches for peak performance.
What are Limit Switches?
Limit switches, also known as microswitches, are electromechanical devices that detect the presence or absence of a physical object. In the context of a 3D printer, they serve as end-stop sensors, signaling the printer’s control board when the print head or bed reaches a specific position along the X, Y, or Z axis. This information is crucial for calibrating the printer, establishing the build volume, and preventing the print head from colliding with the printer’s frame.
Types of Limit Switches Used in 3D Printers

Several types of limit switches are commonly used in 3D printers. Mechanical limit switches, which physically activate when pressed, are the most prevalent due to their simplicity and cost-effectiveness. These switches typically feature a lever or plunger that, when deflected, completes or breaks an electrical circuit. Optical limit switches, on the other hand, use an infrared beam and a receiver to detect the presence of an object. They are often more reliable in dusty environments. Finally, inductive limit switches are another option, using a magnetic field to detect the proximity of a metal object. For the Tevo Tarantula, mechanical limit switches are standard.
Why Are Limit Switches Important?
Limit switches are indispensable for several reasons. Firstly, they ensure accurate bed leveling and calibration. The printer’s firmware uses the limit switch positions to determine the zero point for each axis, establishing the printer’s reference frame. Secondly, they prevent the print head from exceeding its operational limits, which could lead to collisions with the frame or damage to the printer’s components. Without functioning limit switches, the printer could potentially crash into the end of the axis rails or even damage the stepper motors. Thirdly, they contribute to the overall precision and repeatability of the 3D printing process, leading to higher-quality prints.
Tevo Tarantula Limit Switch Components
The Physical Limit Switch

The physical limit switch itself is a small electromechanical component. It usually has a small lever or plunger that gets triggered when it comes into contact with the moving parts of the printer, like the print head or the print bed. This activation causes the switch to close or open a circuit, signaling to the control board that the limit has been reached. The Tevo Tarantula uses standard mechanical limit switches, which are generally easy to replace if they fail.
Wiring and Connectors
The wiring of the limit switches is straightforward, typically involving two or three wires connecting the switch to the control board. The specific wiring configuration can vary depending on the type of limit switch used and the control board’s design. Incorrect wiring can prevent the switch from functioning correctly or even damage the control board. Always double-check the wiring diagram provided with your Tevo Tarantula and ensure that the wires are securely connected to the limit switch terminals and the corresponding pins on the control board.
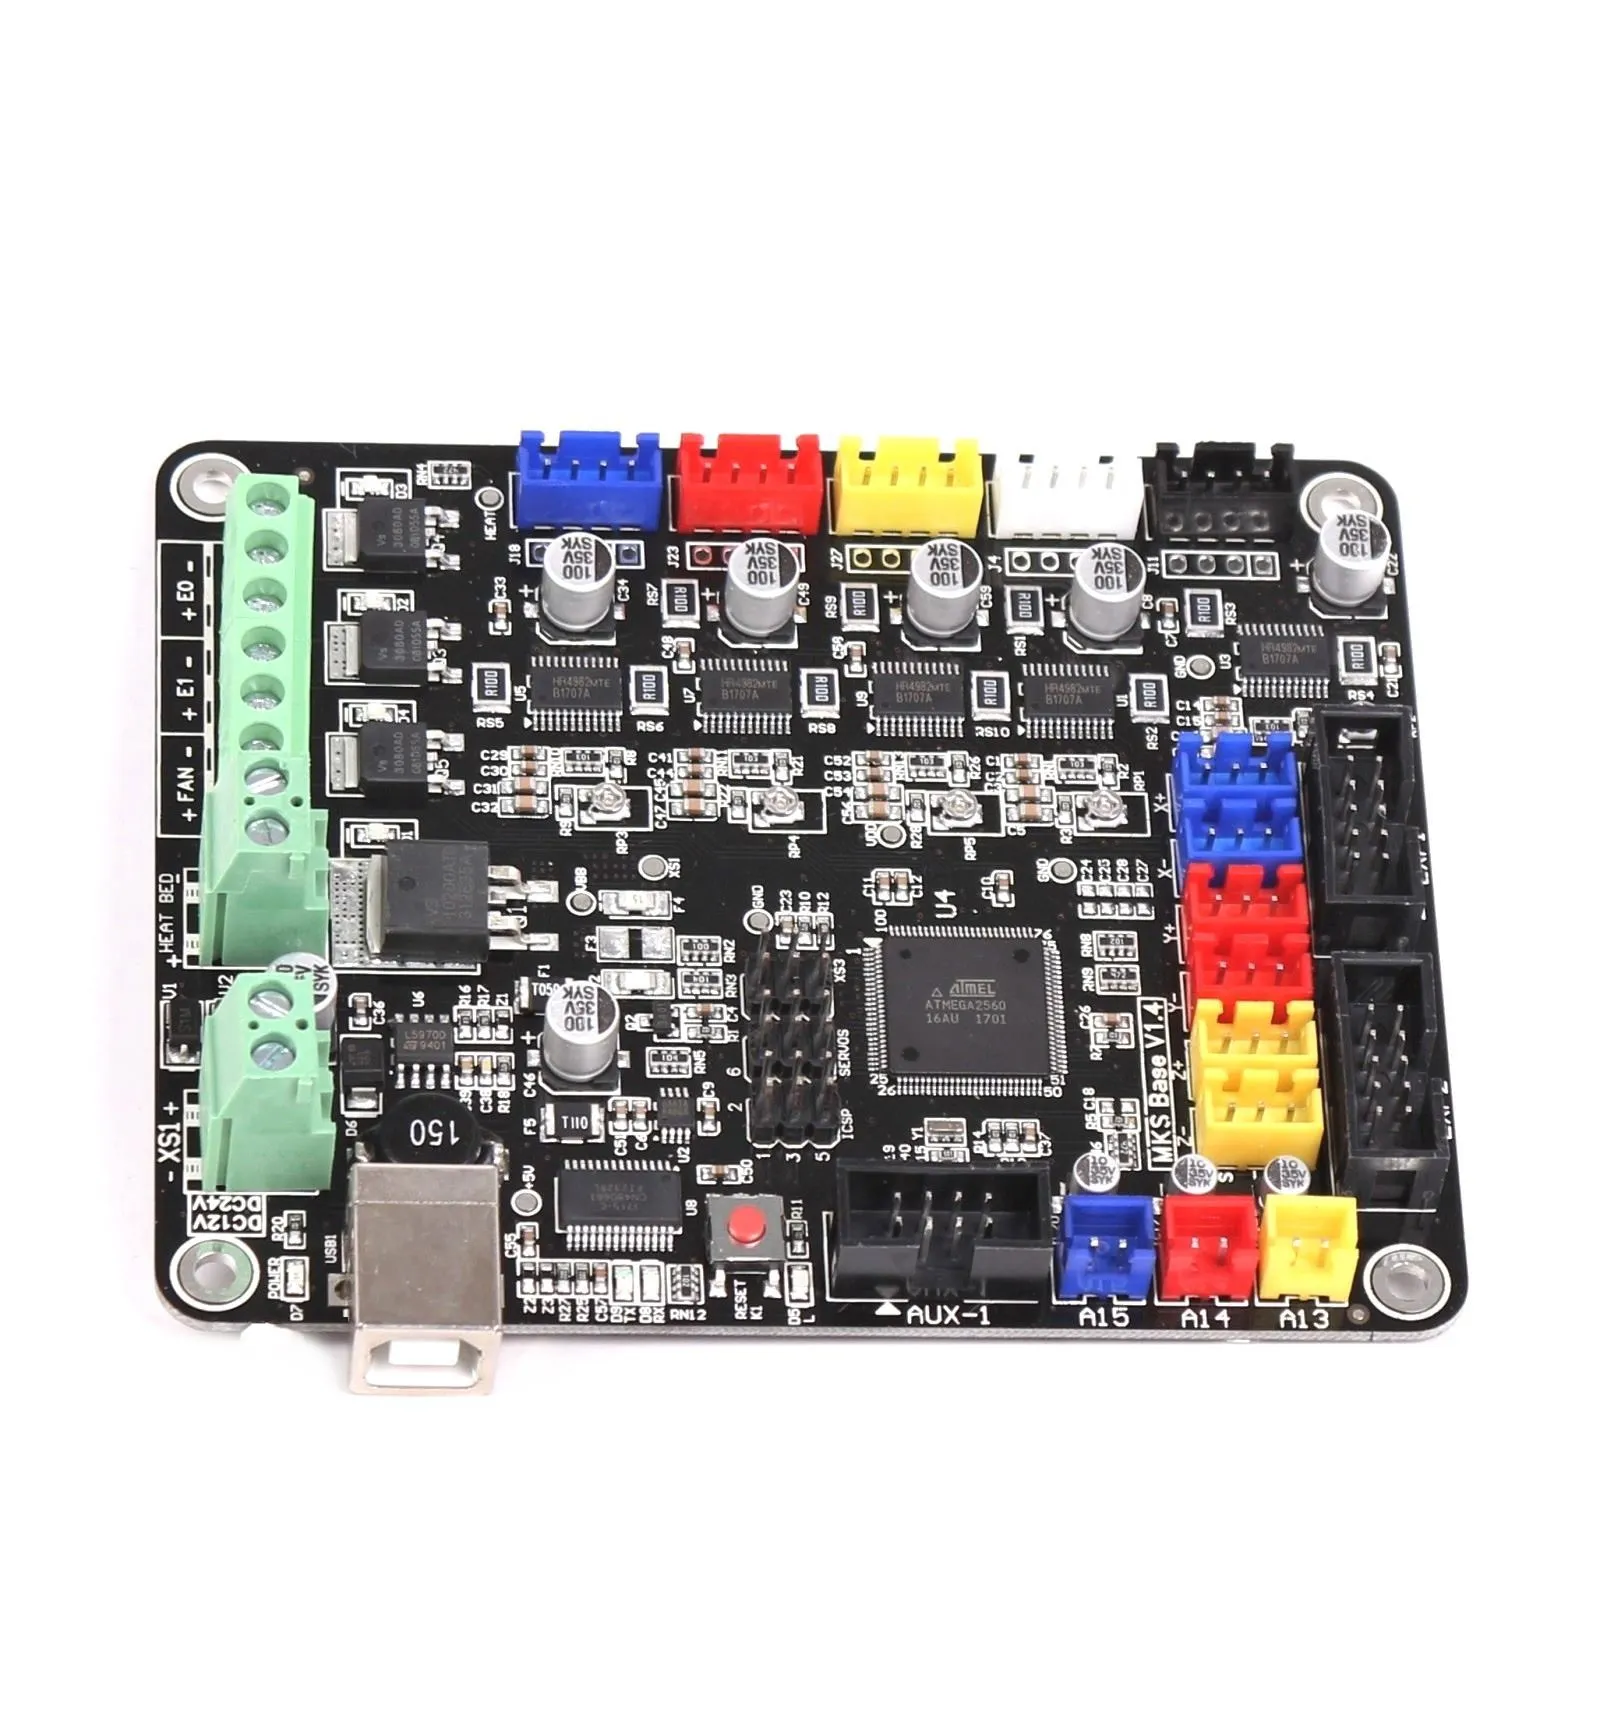
The Control Board Connection
The control board is the brain of your 3D printer, and it plays a key role in processing the signals from the limit switches. The control board has dedicated pins or connectors for each axis’s limit switch. When a limit switch is triggered, the control board detects the change in electrical state and stops the corresponding stepper motor. This allows the printer to determine its position and move within the defined print volume. Therefore, the control board must be correctly configured in the firmware to use the limit switches properly. Incorrect settings can result in the printer failing to recognize the limit switch signals, resulting in printing errors.
Troubleshooting Tevo Tarantula Limit Switches

Even with proper maintenance, limit switches can sometimes malfunction. Here’s a guide to help you troubleshoot common issues.
Limit Switch Not Triggering
If your printer is not recognizing that the limit switch is triggered, this can cause major issues during printing. Here’s how to troubleshoot this problem.
Incorrect Wiring
One of the most common causes of limit switch issues is incorrect wiring. Double-check the wiring connections between the limit switch and the control board, ensuring that the wires are securely connected and that the polarity is correct. Refer to the wiring diagram in your Tevo Tarantula’s manual, and if you are unsure, you can easily find many tutorials online for guidance. Make sure that there are no loose connections.
Faulty Switch

A faulty limit switch can fail to register a signal even when triggered. Use a multimeter to test the switch’s continuity, with the switch in both triggered and non-triggered states. If the switch does not change state when activated, it is likely faulty and needs to be replaced. Replacement switches are generally inexpensive and readily available. Always disconnect the power to the printer before replacing any electronic components.
Control Board Issues
In rare cases, the control board itself may have issues that prevent it from properly reading the limit switch signals. Inspect the control board for any signs of damage, such as burnt components or broken traces. If the control board is the issue, you may need to replace the entire board, or you may need to consult with a technician if the board is repairable. Before replacing it, check the firmware settings on the control board to ensure they are configured to use the limit switches.
Limit Switch Triggering Erratically
If the limit switches are triggering erratically, or falsely, this can be a very frustrating issue. Here’s how to troubleshoot.
Mechanical Issues
Mechanical issues, such as a loose or misaligned trigger, can cause the limit switch to trigger erratically. Check that the trigger is securely mounted and that it makes proper contact with the switch. You may need to adjust the position of the switch or the trigger to ensure reliable operation. Also, check for any obstructions that might interfere with the switch’s movement. Check for any excessive play in the mechanical components and tighten as needed.
Electrical Interference
Electrical interference can sometimes cause false triggers. Ensure that the wiring for the limit switches is properly shielded and routed away from sources of electrical noise, such as the stepper motors or the power supply. You may need to add shielding to the wiring or reroute the wires to minimize interference. Check the grounding of your printer to reduce the effects of electrical interference.
Calibration and Adjustment
Proper calibration is essential for ensuring accurate prints. This involves setting the correct end-stop positions and adjusting the firmware settings. Here’s how to do it.
X, Y, and Z Axis Calibration

After installing or replacing the limit switches, you will need to calibrate the X, Y, and Z axes. This involves moving the print head or bed to the end-stop position and then setting the corresponding axis position in the printer’s firmware to zero. Using your printer’s control interface, home each axis individually. After homing, manually move the print head or bed away from the limit switch and measure the distance. If necessary, adjust the limit switch position or firmware settings to achieve the desired accuracy.
Firmware Settings
The firmware settings play a crucial role in how the printer interprets the signals from the limit switches. Ensure that the firmware is correctly configured to use the limit switches for each axis. Check the endstop_inverting setting and the axis_steps_per_mm values. For example, if your limit switches are normally closed (NC), you may need to invert the endstop settings. Refer to your printer’s firmware documentation for the correct settings. Remember that the settings are different for each printer.
Upgrading Tevo Tarantula Limit Switches
While the stock limit switches on the Tevo Tarantula are functional, there are several options for upgrading them, improving their reliability and precision. Here’s some things to consider when upgrading.
Benefits of Upgrading
Upgrading your limit switches can provide several benefits, including increased reliability, improved accuracy, and reduced noise. Higher-quality switches are less prone to failure and provide more consistent performance. Improved accuracy can lead to better print quality. Some upgraded switches are also designed to be quieter.
Types of Upgrades
There are several types of upgrades you can make. You can replace the standard mechanical switches with higher-quality mechanical switches for improved reliability. Alternatively, you could switch to optical limit switches, which offer higher reliability and are immune to electrical noise. Magnetic limit switches are another advanced option, offering a longer lifespan and more precise triggering. When choosing an upgrade, consider your budget, desired level of performance, and the ease of installation.
Installing New Limit Switches
Installing new limit switches involves a few steps. First, you’ll need to disconnect the power to your 3D printer. Then, remove the existing limit switches and carefully note the wiring configuration. Install the new limit switches, ensuring that the wiring is connected correctly. Finally, calibrate the new limit switches using the printer’s firmware and the steps outlined in the calibration section of this guide. Before powering up the printer, double-check all connections.
Maintenance and Prevention
Regular maintenance and preventive measures will help ensure that your limit switches continue to function correctly and prolong their lifespan.
Regular Inspections
Inspect your limit switches regularly for any signs of wear, damage, or misalignment. Check the triggers for any obstructions and make sure the wiring is secure. Make sure all wires are properly connected. Regularly check if the limit switches still work correctly.
Cleaning and Lubrication
Keep the area around the limit switches clean to prevent the accumulation of dust and debris, as this can interfere with their operation. Use compressed air to blow away any dust. If necessary, lubricate the moving parts of the printer, but be careful not to apply lubricant directly to the limit switches, as this could affect their performance. Use a small brush or lint-free cloth to clean the limit switches.
Tips for Long-Lasting Limit Switches
Here are some tips to make your limit switches last: Protect your printer from extreme temperatures and humidity. Handle the switches carefully to avoid physical damage. Ensure your printer is properly grounded to minimize electrical interference. Regularly check and adjust the limit switch position to account for wear and tear. Use high-quality limit switches when replacing faulty ones. By following these maintenance tips, you can significantly extend the lifespan of your limit switches and improve the reliability of your 3D printer.
In conclusion, understanding, maintaining, and optimizing the limit switches on your Tevo Tarantula is essential for achieving high-quality prints. This guide has provided a comprehensive overview of limit switches, from their function to troubleshooting and upgrades. By following the tips and recommendations in this guide, you can ensure your Tevo Tarantula’s limit switches operate reliably and contribute to successful 3D printing projects. Regular maintenance, careful calibration, and the occasional upgrade will keep your printer running smoothly for years to come, so get printing!